Pages

Showing posts with label 3ds max. Show all posts

Wednesday, 14 November 2012

Internal Client Project Progress- Texturing

This week I have been doing most of the texturing stage of the project, still sticking to my brief action plan I did before I started creating it, so far so good! :)

Anyway, I have just about done most of the texturing now, although it will not look finished until I add lighting and all of the glow effects for the LED textures. For now these just have self illumination within them, and the glow effects will highlight this much more.

Here are some quick renders I did to show the textures I have decided on for the interior space:

Bed with TV blind

Desk area - LED fabric computer, touch keyboard, etc.

Slide door and keypad from interior (and heated rug)

Entrance - slide door, keypad and metal floor

Touch fabric keypad for entry

TV blind on bed

Sofa area - LED cushions and curtains (and heated rug)

The truth is I guess in some ways I have cheated a lot within this stage, as I have used ALL UVW map modifiers on the objects, rather than unwrapping them. However, due to my choice of modern/futuristic style, I feel all the materials I needed to use did not require this process anyway,as a lot of the textures are either smooth, reflective plastics or easily map-able fabrics with bump maps.

Note I also need to still convert a video files for the texture on the LED TV blind on the bed, as this is currently a still image.

Friday, 26 October 2012

Internal Client - Feedback & Production!

I have done my presentation for the internal client project, and received both good and bad feedback.. My style and general idea seems to work pretty well, but my choice of audience (graduates and potential collaborators) did not fit this idea very well. Therefore, instead of changing the whole feel and narrative of my advert, I have decided to change my audience to possible retailers or designer interested in the products within the advert. Other than this, my feedback was pretty good, I just have to consider the shape of my interior space fitting with my chosen style (futuristic), and think about my time management a little more.


So now I am starting the production process, beginning with modelling the items, and testing out skills I may need later on. For instance, I have tried using the vray renderer at university, and found it quite challenging and totally new! However, I do think it could be worth using over mental ray if I learn enough in time, so shall see how it goes before I have to begin texturing and lighting. I have also been learning and experimenting with the cloth modifier in 3ds max, as this is something I will most likely need to make the fabric objects within my scene.

Here is a quick test I did using a cloth plane colliding with a box and a ground plane :)


Cloth Simulation - 3ds max from Samantha Freeman on Vimeo.

Monday, 17 September 2012

Experimenting with lighting...

I have been on holiday in Benidorm since last weekend and only just got back (freezing here!), but before that I did some quick lighting experiments with my old DP3 work from my second year in 3ds max. I didn't get chance to post them before I went, so am doing so now! :)

Here are the renders I did - a couple for each piece of work (so far...):

Still Life Visualisation Project:

Evening time with volume light

Night time with a cool feel

Morning/midday - very bright sunlight from window - happy feel?

Silent Comedy Animation Project

Daytime with warm-feeling sunshine

Nighttime with a cooler feel, but with yellowish street lights.

'Of Mice and Men' Bunkhouse Visualisation Project

Night time with cool feel

Night time with cool feel - stove light

Morning light with warm feel and volume effects

Morning light with warm feel - subtle stove light

I feel this has helped me a lot with lighting a scene dependent on time of day and mood, and think I am improving with my overall skills using the standard lighting within 3ds max. However, I am still unsure on how to use some lighting systems and photometric lights, which I will look into more in the next few days. I am still also gradually collecting more research and articles to help with the project and examples of 3d environments that inspire me. I may also experiment with how post-production techniques can produce similar effects too. :)

Thursday, 31 May 2012

Compositing Projects - Outcomes

I have now completed both projects for this compositing module, which I am ready to hand in. I am pretty pleased with the outcomes, although I would have liked to have used more accurate editing in After Effects but I have not yet got a vast enough knowledge for this standard of work. Also note, I haven't added any sounds to these videos, mainly because it wasn't stated in this particular brief, and I wanted to focus on the compositing skills rather than extra effects, etc. Anyway, here are my completed videos for both the character and creative effects compositing projects. :)


Thursday, 17 May 2012

Compositing 3D into a photograph :)

The first of two compositing projects for the end of my second year involves animating a character realistically into a still photograph or video file.

I have experimented with my character from my previous animation project with a chrome material (this was advised in the brief, so I hope I am not cheating :D ) into a photograph on a reflective work surface from the kitchen.

Part of the brief states the character must walk/go behind an object in the image, compositing in 3D using the shadow/matte/reflection material. In this example I have used a mug, and placed a 3D teapot behind it, to show that I know my material set-up is working.

Anyway, here are a couple of renders and a quick video showing how I have added depth of field using a simple zdepth map. (I still havent got the hang of making this look very effective yet - something I will practice more...)

jpeg render with environment background

zdepth map render pass

A quick sample of zdepth and len blur in action:

Wednesday, 9 May 2012

Visualisation Practice - Daylight system v. Standard Volume Lights

Basically, because I rather like doing visualisation work, I have decided to keep practicing it, seeing as it's nearly the end of the year and only have one project left to do (well.. two mini ones I think). First of all, I just made a simple room with 2 windows in 1 wall and a camera facing this wall. I then added a few objects, before trying to add light and shadows from the windows.

Firstly, I tried using standard lights with the volume light effect coming from outside the windows. I also used a couple of standard omni lights of a similar colour to the wooden floor to light the scene generally.


Secondly, I tried using a daylight system to add lights from outside the windows. With this, I then experimented with the mr (mental ray) sky and daylight settings, so I could have the illusion of a ground plane outside. I also used some photometric omni lights for the same effect as the previous example. However, for these lights, I had to combine their "kelvin" levels and the photometric exposure settings to get my desired colour and brightness.


I think if I used these techniques combined (i.e. use a daylight system and photometric lights, but also adda couple of volume light effects onto photometric spotlights from the windows?) then I could achieve a better effect overall.
 

This is only very simple lighting in terms of visualisation, and I will be learning and trying muuuuch more over the summer, as lighting and cinematrography are the main parts of my research question. :)

Thursday, 26 April 2012

"Location Location" Project Evaluation & Outcomes :)

Animation:

4 High Resolution Stills:


Evaluation:

For this project, my task was to produce a 60 second walkthrough of an interior space from a different time period, using a description from a book. The book I chose was ‘Of Mice & Men’ by John Steinbeck, as it was a book I read back in my school days and remembered a particularly good description of the main setting of the novel – the bunkhouse.
                The description, from the start of the second chapter, mentioned many aspects such as room shape, doors, windows, beds and many other objects and their materials within the one large room. This helped a lot with my initial ideas and research I needed for my presentation. After the research, I sketched out all of the objects I needed in the space, as well as producing a moodboard for textures and mock-ups of the layout. I think the encouragement that the presentation brought upon me to research the theme and explore ideas towards the start of the project really helped with the development of my work. I think that without this pressure, I could have left it until a lot later in the project and not have achieved such a successful piece of work.
                After all of this pre-production work, I then started to model my scene and choose the best textures I had gathered within my research. I think my modelling skills have improved drastically within this project, as well as from my experience in the last visualisation project. I particularly think my model of the cast iron stove was very good in comparison to some of my previous models. I only gave this a simple standard material with a bump map, however, so it could have looked better with more texturing knowledge.
                I hardly used the unwrap modifier within this project, and found the UVW map modifier much less frustrating to use, and just as effective, if not more in some cases. I used a lot of the same wood texture (found from cgtextures.com) within the scene, but edited the hue and saturation levels in Photoshop to give different wood shades for different objects.
                Once again, lighting is one aspect I am not overly happy with in this piece of work. This is mainly due to the fact that I wanted to use the volume light effect on some of my lights to show the morning light streaming through the windows, like it is later described in the book. However, to render this in the animation sometimes took approximately 6 minutes a frame, so I found it highly impossible to achieve within my time limit. However, I did use one volume light coming from the centre window on one of the walls in my high resolution still frames, to show the effect I wanted to achieve in my animation. I think this looks quite a bit better, but still could work on more atmospheric light effects, which is why I have chosen a similar topic for my research project next year.
                Overall, I am pretty pleased with the outcomes of this project, and think my modelling and texturing has kept on improving drastically since the start of this year. I also think my knowledge and use of lighting and rendering is improving a little too, and is something I will work on more. I am still eager to specialise in environment design, and this project has heightened my interest in the field of visualisation as a future career.

Friday, 13 April 2012

Silent Comedy Animation + Evaluation.


For this project, my task was to produce a 60 second character animation, following the theme of silent comedy and slapstick.  I had to create a character that could apparently think, decide, pick something up, drop something, walk, climb, trip, slip and fall, by creating a suitable CAT rig and using the skin modifier in 3ds Max.

Towards the start of this project, I strongly focused on learning various modelling and animating techniques from tutorials given to us throughout the project, as well as coming up with the general main plot for my animation, and choosing the character that I wanted to use. I then started following more of these tutorials, using my character concept and drawings to help me create my final work.

I chose to create a geeky male character for my animation, in a scenario that a geek would perhaps not be comfortable in usually – playing basketball. I wanted my character to get angry whilst failing at getting a basket, and then get hit in the face by the ball and slipping over (like in a typical slapstick comedy).

I briefly looked at some slapstick comedy towards the beginning too, such as Charlie Chaplin and Warner Bros, but I feel I didn’t do as much research into the theme as much as I would have liked, and tended to focus on the animation and modelling more. I think if I had have planned and researched better, my project may have been more thorough and successful, however I am quite pleased with my outcome to say I am not particularly interested in the field of character design and animation as a career.

I spent a lot of time of this project on modelling and texturing the character itself before any of the animation or environment was started. I found the modelling of the character quite time consuming, but pretty straightforward when following the tutorials I had. However, the UVW unwrap modifier was something that took me a while to get my head around at first, in particular the peel tool. I also found when painting my character in Mudbox, that it was quite hard to make my texture map as neat and tidy as I would have liked, so ended up doing the rough outline in this software, before tweaking it properly in Photoshop to get rid of visible seams and mistakes.

I then moved onto another complex part of the project – CAT rigging and the skin modifier. I found making my own CAT rig quite simple to understand in 3ds Max. The skin modifier and the “edit envelopes” option, however, I found quite frustrating and still did not get my character’s skin to move as I would like it to when I animated the bones. For instance, when he bent over, the shorts would cut into the t-shirt no matter how many times I tried to improve the envelope settings.

I then created my simple environment and props in the scene, before animating it all within this environment. This included a road, a house, a basketball hoop, basketball, dustbin, etc.  I tried to make this environment as simple and as similar to the cartoony style of my character as possible.

Overall, I am quite happy with the outcome of this project in terms of my limited time schedule and other commitments in other areas of my pathway. Although, currently, I am not as interested in animation and characters as other areas such as visualisation and environment design, I feel I have learned some important skills throughout this project, such as rigging and UVW unwrapping, and it is something I could consider learning more of in the future.

Monday, 2 April 2012

Update on Visualisation Project

To give myself a bit of a break from the animation project, I have been trying to get some of the modelling doing for my 'Location Location' visualisation project. A lot of this modelling is quite basic for now and will hopefully look considerably better once textured and lit properly later on in the project. :) As this area of work (visualisation/environment design) is the area which I most want to end up working in, I feel I am going to concentrate on the texturing and detail much more than in my other project, to try and help me get a little better before the research and client projects next year.

Anyway, here are a few quick renders showing the basic untextured models so far... (I have textured a quick floor and made some whitewashed wooden planks too which I used to test lighting effects)

Bunk bed model with apple boxes (no sheets)

Single bed model with apple box (no sheets)

Iron cast stove with chimney model

Models of square table, and wooden crates as seats

Wooden barn-style door model (and the previously mention planks I made to experiment with how light could pass through)

And to show the general spacing and layout of my scene so far:


Sunday, 5 February 2012

Character Texturing

I have spent most of this week attempting to unwrap my character in 3DS Max, before painting it in mudbox and then re-opening it in 3DS Max. I had quite a bit of trouble making the subdivisions/meshsmooth fit with the texture I made in mudbox, so had to keep editing it in Photoshop until the shape of the hair seemed to fit as neatly as possible with my smoothed model.

So, this is my final textured model for now and the UV map that is texturing it.. unless I decide to change the colours (which should be easy using the UV map I have already edited in Photoshop! :D )

Character model with texture in 3DS Max - he looks so shocked/scared at the moment :p


Original UV unwrap map from 3DS Max

Final UV map for character - Mudbox and edited in Photoshop
Character head

Character shoes

Character torso

Screenshot of painted model in Mudbox

Thursday, 17 November 2011

'The Chess Player' Animation - Video + Rationale

Here is my final animation:


Animation Rationale:

‘The Chess Player’ project involved me producing an animation of at least 30 seconds that showed a self-defeating chess-playing robot. To do this, I produced two robot arms (supposedly of the same robot), which I rigged and animated using IK chains and the reaction manager. I also modelled a pretty simple environment of a study/office style room, with a centre piece of table and chairs, where the game of chess between the two arms took place.
In my animation, I decided to show a very short game of chess, where the white player wins within four moves, which was animated within approximately 1 minute rather than 30 seconds. I tried to show emotion and character within my characters through movement and gestures, as they did not have eyes or mouths. A main gesture to show victory or disappointment was the nod or shake of their palms - acting as their heads. Another one I used a couple of times was tapping their fingers on the table to show thought or concentration.
Within this project, I feel I have learned a variety of very important skills used in many areas of the animation industry. Perhaps the most vital and difficult of these skills was the use of inverse kinematics (IK chains) when rigging up my robot arms, as well as using different animation constraints and the reaction manager. These techniques are associated with the field of character design and animation within the 3D pipeline.
I also feel that throughout the production of this piece of work, I have learned a lot more modelling techniques within 3DS max, such as quad modelling, the lathe modifier and attaching shapes objects with the editable poly modifier. In addition to modelling, I have also learned a great deal about texturing with both standard and mental ray materials, and the effect this can have on rendering times. An important material I learned how to use is the ambient occlusion mental ray material, which renders separately and is then composited with my original renders in After Effects to produce an animation with better quality shadows.
I found myself facing many problems during this project, mainly due to the animation aspects towards the end of the production stage. For instance, I ended up moving the chess pieces together with the hand when animating, rather than using the recommended link constraints, due to the chess pieces wanting to follow the palm even after linking them back to the world. I also had some trouble trying to make the king fall and roll at the end of the animation, as it is seemingly impossible to animate pivot points within 3DS max. I solved this by carefully rotating and moving the piece along the table so it did not move above or below the surface of the table as best as I could manage.
After doing my first 3D project this year, I can still see myself doing work in either modelling or texturing rather than an actual animation role in the future, due to the complexity of rigging and the problems I overcame whilst trying to use link constraints within this project. I have really enjoyed this project overall, however, and am now interested in the field of animated film much more, in addition to my current strong aspirations of working in visualisation or game design.

Friday, 11 November 2011

Animation Camera Shots

So I am on the final stage of animating my piece before final texturing tweaks and rendering - cameras.

I find it quite difficult to get it looking natural and not too jerky, but have done a quick small render of a few camera shots for the start of my animation to see if they flow well together, and think it is pretty effective so far... for me.


So I will carry on doing shots like this throughout for the different moves/gestures by the robot arms.. Not long to go now hopefully! (:

Friday, 16 September 2011

Hmm. Been practicing again.

Watched this very long pretty much pointless tutorial on standard lighting with interiors...

http://cgswot.com/tutorials/3d-tutorials/183-37-interior-lighting-with-3ds-max-standard-lights.html

Well it wasn't pointless, I just watched it without copying any of it, just trying to understand why he used so many lights! I am still not much wiser about types of lights and when/where to use the. I find it all very confusing to be honest.

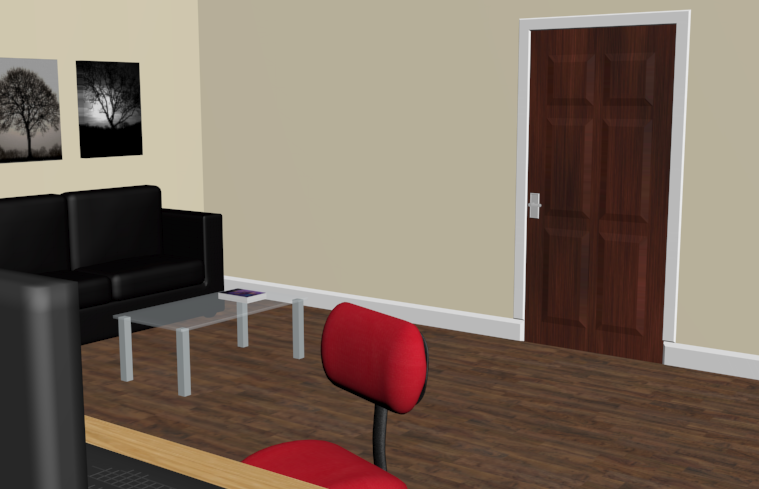
Anyway! I have added a couple of windows to the little room I made last month in preparation for TRYING to add some decent daytime lighting.


I did this by deleting polygons on both sides of the walls; bridging the edges to fill the gaps; extruding appropriate sized polygons to make window frames (swift loop used). I then made a glass window (well, sort of glass) by using a transparent material with high specular levels, and then made a plane with a material of a cloudy sky to place behind my windows!

Oh how very simple... :D 

I am now going to look for a good 3Ds max book to add to my collection. Preferably a lighting based one... Seeing as I think I need it, aha! :)

Toodles.

Saturday, 27 August 2011

Random postingg..

Update on what's been cracking off in my little random experimentation over the past week or so...


I remember telling Roma and Giselle I would practice lighting so I guess I should research thisat some point as it is the one thing I really don't understand! It did my head in during moving image :( I might get a book or something to help if I really struggle as my current book doesn't have a lighting section.

Also just as a random addition... Discovered this band and find this video really clever... Like it a lot.


Byeee.


Tuesday, 23 August 2011

Updates... D:

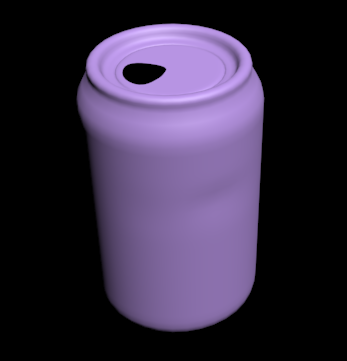
 Got frustrated trying to make this can D:


So here is my other stuff I did yesterday. Aww little fire. ^_^


Coloured ink filter. Liking this :)

Saturday, 20 August 2011

Stuck at this for a few hours and...

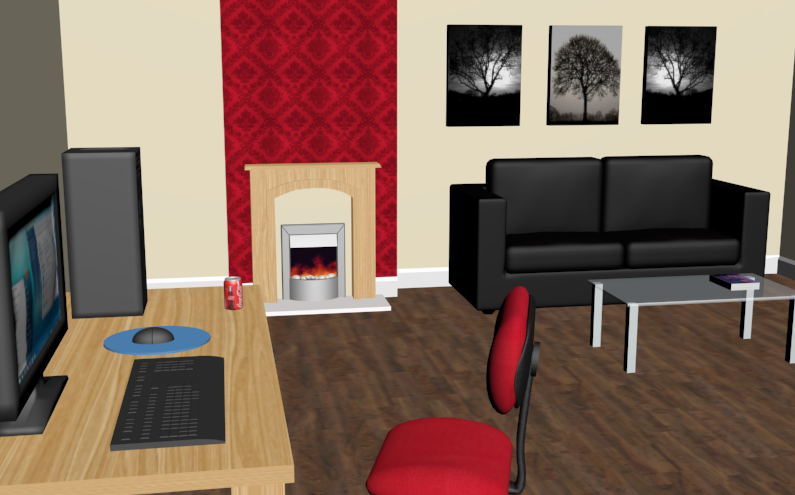
I am officially proud of this office chair so far. :)


Now I can go to bed!


Zzz.....

Soooo.. I got bored.

Indeed I did... Therefore I decided to have a crack at some basic modelling/visualisation stuff to get my brain working again after a summer of gaming and not much else!

I have officially not done much and it is a little rubbish as I forgot how to do a few things and haven't got back into it yet. But here is a preview of a computer on a desk. Woohoo.


Shall post more progress on from this if I stick with it... (And don't go on Gran Turismo 5 as much, aha! :D)

Oh and by the way... I am loving this stylized rendering and viewports on the new 3ds max.. Heres a few examples..
Coloured pencil filter

Colour ink filter

Graphite filter
Ink filter


Toodles! xx