Just a quick post to show a short flyover style video I did for my external client project of Nottingham Castle. Like my stills, it shows the parts I have modelled with full textures and the parts my peers made in a grey texture. :)
'Castle Attack' Client Project from Samantha Freeman on Vimeo.

Showing posts with label clientproject. Show all posts
Showing posts with label clientproject. Show all posts
Wednesday, 1 May 2013

Tuesday, 26 March 2013
External Client Project Outcome - Rendered Images
The main outcome for my client project was to submit my 3ds max project file and texture folders, but I also decided to render stills of each wall in their environment using a merged file of all of our models in one scene. I did these using my final textures on my parts, and texture the rest in a light grey to highlight to the client which part was created by me.
Here are my rendered images of my final models:


Here are my rendered images of my final models:

Tuesday, 19 March 2013
Castle Texturing - Diffuse Maps Done.. I think
As the title suggests, as I aimed to do, I think I have completed the main diffuse maps (colour information) for the textures of all three of my walls of the castle now and it is looking pretty good. I know I am not great with normal maps from what I have experimented with so far in photoshop, but think I should be able to add a little more detail with this when I have made these maps from my diffuse textures - hopefully by tonight or earlier tomorrow. If I have time, I may also look into how specular/reflections can be creating through texture maps, to see if I can improve the effect of the windows.
Below are a few renders of the (pretty much) final diffuse textures on a merged file of the castle walls. (Notice I have also added a basic plane for the roof... not sure if I have time to do the chimneys too - I shall see!)
Below are a few renders of the (pretty much) final diffuse textures on a merged file of the castle walls. (Notice I have also added a basic plane for the roof... not sure if I have time to do the chimneys too - I shall see!)
 |
| View from East front wall |
 |
| View from North front wall |
 |
| View from South front wall |
Monday, 18 March 2013
Texturing Update - North front wall and Basement/kitchen
I am currently rather ill if I am honest, but still trying to do a bit work here and there until I start to feel the effect - trying to get the texturing done a couple of days before the deadline would be nice! At least I don't need to do a walkthrough for the client, so no rendering this time (woohooo).
I have tried to texture the north front wall and basement areas in a similar style to the other sides of the building and here are some iterations of the texturing process so far, up to the point of having most of the diffuse detail mapped out:
I think this is working quite well, although some changes to be made before creating the normal maps could be to change the colour and aging on the main balcony area (edges and pillars) on the basement, aswell as slightly more detail on some window frames, and making these match with other walls a bit better.77
I have tried to texture the north front wall and basement areas in a similar style to the other sides of the building and here are some iterations of the texturing process so far, up to the point of having most of the diffuse detail mapped out:
 |
| 1 - Texturing the main walls and edges |
 |
| 2 - Texturing the windows, door and pillar detail |
 |
| 3 - Texturing the window and door frames to add final effect |
I think this is working quite well, although some changes to be made before creating the normal maps could be to change the colour and aging on the main balcony area (edges and pillars) on the basement, aswell as slightly more detail on some window frames, and making these match with other walls a bit better.77
Thursday, 14 March 2013
Castle Texturing - getting there!
I am now in the final week or so of this client project - time has flown by and am finding myself frantically trying to finish texturing and organising the project for submission on the 22nd.
I have been working on the East and South front walls so far, unwrapping them all using the flatten mapping tool and texturing in Photoshop. Okay, so originally the plan was to use so called 'vector textures' but Illustrator seemed quite challenging to get to grips with in terms of producing more realistic textures, so we decided to go back down the Photoshop route for now. We have also been given the Substance Designer software to consider using for the project, although I still haven't figured out how to use this effectively, as my textures tend to look less detailed using this substance method, but I still have a few days at the end to consider producing a version with these textures used with the same source bitmaps, etc.
Here are some of my main textures and examples of unwraps so far to show how it looks at the moment...

From looking at these now, and also merging in 3ds max, I can see that they are slightly different colour tones, as in the south front wall seems more much yellow and saturated, so this is something I can work on later on when adding finishing touches. Also, the archways on the south front wall are proving difficult to texture effectively because of the low poly effect on the tops of them, so I may add a few more segments after texturing, by collapsing the unwrap modifier onto the editable poly modifier in 3ds max, therefore not effecting the final texture.
Another technique I have been working on is creating normal bump maps. This is basically like a bump map I am used to using in 3ds max, where an image is created to add an effect of relief, but it also effects lighting and shadows. These normals maps are blue and purple mainly in colour, and I am creating them using the nvidia normal map filter in Photoshop. Here is an example of how I have experimented with it so far...
I have been working on the East and South front walls so far, unwrapping them all using the flatten mapping tool and texturing in Photoshop. Okay, so originally the plan was to use so called 'vector textures' but Illustrator seemed quite challenging to get to grips with in terms of producing more realistic textures, so we decided to go back down the Photoshop route for now. We have also been given the Substance Designer software to consider using for the project, although I still haven't figured out how to use this effectively, as my textures tend to look less detailed using this substance method, but I still have a few days at the end to consider producing a version with these textures used with the same source bitmaps, etc.
Here are some of my main textures and examples of unwraps so far to show how it looks at the moment...

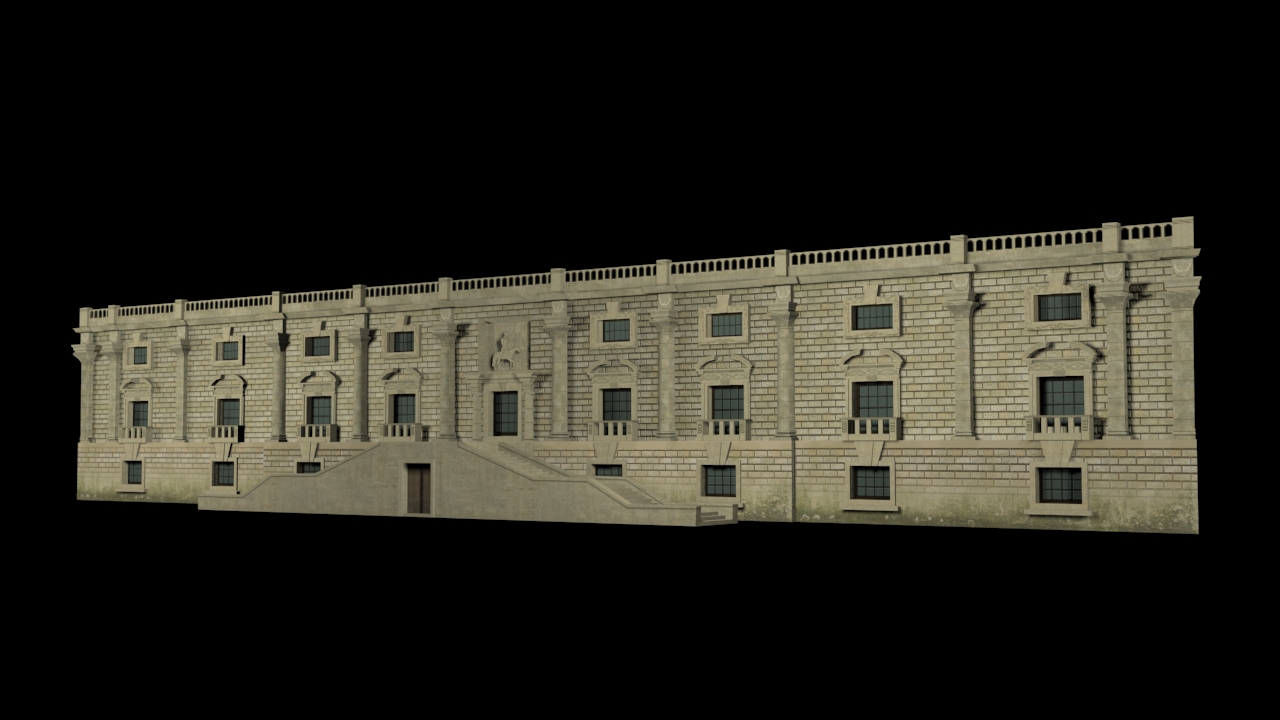 |
| East front main wall - added some dirt and detail since meeting |
 |
| Main pillar unwrap |
 |
| Entrance steps unwrap |
 |
| East front main wall unwrap |
 |
| South Front texture progress |
 |
| South front main wall unwrap |
 |
| South front balcony unwrap |
From looking at these now, and also merging in 3ds max, I can see that they are slightly different colour tones, as in the south front wall seems more much yellow and saturated, so this is something I can work on later on when adding finishing touches. Also, the archways on the south front wall are proving difficult to texture effectively because of the low poly effect on the tops of them, so I may add a few more segments after texturing, by collapsing the unwrap modifier onto the editable poly modifier in 3ds max, therefore not effecting the final texture.
Another technique I have been working on is creating normal bump maps. This is basically like a bump map I am used to using in 3ds max, where an image is created to add an effect of relief, but it also effects lighting and shadows. These normals maps are blue and purple mainly in colour, and I am creating them using the nvidia normal map filter in Photoshop. Here is an example of how I have experimented with it so far...
 |
| End pillar normal map test |
 |
| East front wall normal map test |
 |
| South front wall normal map test |
Wednesday, 6 March 2013
Castle Texturing - Busy!
I haven't posted in a while for this project, mainly because texturing has taken a long time for me to get my head around - unwrapping and then making the textures. Eventually after playing around with Illustrator and Substance Designer for a while, I decided that the whole 'vector texture' thing may not work out and definitely didn't look as effective as I knew I could make it in Photoshop. So for now I am making the textures totally in Photoshop, then if it is required, I am pretty sure they could be converted into vector graphics within Illustrator, although they do turn back into bitmaps in Substance Designer - confusing!
Anyway, here are some renders I have made of my pretty much complete version of the East front wall of the castle to show in my client meeting tomorrow:


Castle Attack Project - East Front Wall Textures from Samantha Freeman on Vimeo.
Anyway, here are some renders I have made of my pretty much complete version of the East front wall of the castle to show in my client meeting tomorrow:


I also made a quick video to show the textures with camera movement in order to gain any feedback. The only part that I think needs improving from looking at these is the door in the stairs, perhaps.
Castle Attack Project - East Front Wall Textures from Samantha Freeman on Vimeo.
All I need to do to these now is to add bumps maps and any other maps I feel necessary to bring them to life a bit more... This will either be done in Photoshop again or in Substance Designer, but I am not totally comfortable with getting a good effect with this software yet.
Wednesday, 20 February 2013
Castle Modelling - Almost Done!
I have modelled practically all of the main body and detail for my part of the Castle Attack client project now, trying to follow the instructions given by Simon to the best of my ability. It still has a LOT of faces (triangles) to be honest - about 22,000 for my parts alone. I will therefore suggest a total limit for the whole scene to be about 40,000 faces, as the suggestion we were given was 30,000-50,000.
Here are some renders/screenshots of my (almost final) model for this project...


From now on, I will look into the texturing process that we need to follow, and begin to work on this part of the project. Hopefully it won't be as time consuming as it seems! 4 weeks to go!
Here are some renders/screenshots of my (almost final) model for this project...


From now on, I will look into the texturing process that we need to follow, and begin to work on this part of the project. Hopefully it won't be as time consuming as it seems! 4 weeks to go!
Wednesday, 13 February 2013
Castle Stuff..
Despite not receiving any feedback on modelling techniques and polygons/triangles yet, I have now modelled most of the detail on the main east front wall of the castle building, using the technique I think most appropriate. It does use A LOT of faces in terms of counting "triangles" (maybe like 12000 total for the wall) with the Polygon Counter tool, so I am hoping we should be counting polygons instead now as it would be half this amount! Haha. :)
Anyhoo, here are some screenshots and renders of the wall so far and of a quick merge with the previous file...


Anyhoo, here are some screenshots and renders of the wall so far and of a quick merge with the previous file...


Monday, 11 February 2013
'Castle Attack' progress - merging files etc.
Last week we decided to merge all of our models so far of the basic shell of the castle in 3ds max, to see if everything is working as planned and fitting together nicely. :) It worked pretty well actually, so we decided to e-mail Simon as he had requested us to in our first week or two of modelling to keep an eye on what we are doing. I still haven't had a reply, but am waiting on it!
Here are some screenshots I got of mine and Amanda's models merged together in one Max file:

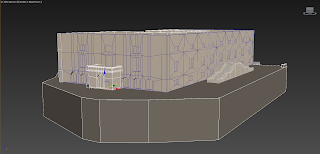


At the weekend, I also had a go at modelling the rather detailed window frames from the East Front wall, discovering that it is very hard to produce the whole object in low poly! For instance, my first attempt was the example below, which only just has less than 1000 faces when counting triangles with the polygon counter (I think this is the tool we need?).

Here are some screenshots I got of mine and Amanda's models merged together in one Max file:


I have also just experimented with importing this geometry into the 'Unity' game engine software - to be honest I really don't understand this software, all I can do in it is literally import and view the models. I did it with both an FBX file and OBJ file, which both seemed to work okay, although the FBX file contained materials, but seemed to be very laggy in the viewport.
 |
| FBX file imported into Unity |
 |
| OBJ file imported into Unity |
 |
| First attempt - too many polys?! |
I have now had a second crack at it, editing my previous version, removing edges and vertices along the way, and have now managed a lower poly version amounting at 660 faces using the came method of counting. This is still a lot for 1 window frame, but I guess that they aren't all quite this detailed.

Wednesday, 6 February 2013
Modelling the Castle Walls
During my first week of making work for this client project, I planned to produce the main geometry of the 3 castle walls I have been allocated, which I think I have successfully completed. I have modelled each side of the building as a separate model for now, and will probably attach them later on if this is required. I have also checked the main wall measurements after Amanda informed me some were slightly off, therefore altered them as needed. I think I am going to email my progress so far and any questions I have to Simon (Hot Knife) tomorrow before or after meeting for tutorial, as he is in charge of the technical side of the project.


Anyway, renders/screenshots of the model so far!
 |
| Model with wireframe overlay (North Front end) |


 |
| Model with wireframe overlay (South Front end) |


Monday, 4 February 2013
Modelling walls again - Lower poly method!
I had just modelled most of the main geometry of the exterior walls of the castle, when I realised there was a better method to get less polygons, which was also a lot simpler. From looking at other low poly/game design examples, I discovered that creating basic divisions then insetting the polygons, instead of producing lots of divisions using the connect tool. The screenshots below the difference in polygons from my first and second versions of the East Front wall.

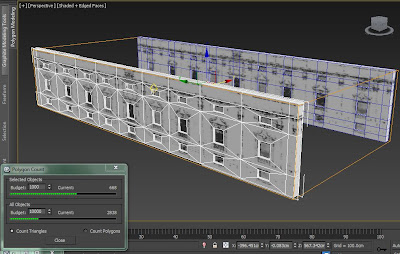
I also think that this method of modelling will be a lot easier for us to both follow the same structure, as I am not doing all 4 sides of the building. I have so far completed most of the exterior geometry as before, and just need to add the balcony areas, specifically on the South Front wall with the archways.


I also think that this method of modelling will be a lot easier for us to both follow the same structure, as I am not doing all 4 sides of the building. I have so far completed most of the exterior geometry as before, and just need to add the balcony areas, specifically on the South Front wall with the archways.
 |
| East Front wall with wireframe overlay |
 |
| South Front wall with wireframe overlay |
 |
| North Front wall and basement with wireframe overlay |
Subscribe to:
Posts (Atom)