I did my presentation yesterday so that is a huuuge weight off my shoulders. It seemed to go rather well, Simon and Andrew said it was a good presentation I just need to be more confident... I always get told this, aha. I will bear this in mind anyway.
I have now finished Module numbero uno of my multimedia course and have a month off for Christmas. So, I'm guessing I won't be posting anything here for quite a while! You never know though, I might get bored and do some random animation or something :P So see you in a months time probably!
:D
Friday 10 December 2010
Monday 6 December 2010
One Shot - Rule of Thirds
Here are a couple of pictures I whipped up to demonstrate how the "rule of thirds" could be referred to in my edit of the one shot film. When filming, I tried to keep the focal point of the bench in the middle section of the view finder. I think I kept to this quite well, although the characters were slightly towards the left at the end of the film. However, this was due to the placement of the actors themselves, as the centre of the bench was still in the middle section. :)


Sunday 5 December 2010
My Final One Shot Film Edit.
So here is my final personal edit of our one shot film.
We decided to name it "A Suspicious Birthday" as it represents the subject well.
For my edit, I decided to use one of my earlier ideas of using a CCTV style for the serious part of the film. To do this I made it black and white and added noise both on the video and on the sound (white noise). I then dissolved to a more colourful image without white noise (as I zoomed in in the original footage.)
Towards the end, I added my own recording of party blowers as well as a clip of the start of Cliff Richard's "Congratulations" song as I thought it was appropriate and fitted in well with the build up to the change of mood.
I also think my use of titles fitted well with the moods of the film
"A Suspicous Birthday" One Shot Film - Personal Edit from Samantha Freeman on Vimeo.
We decided to name it "A Suspicious Birthday" as it represents the subject well.
For my edit, I decided to use one of my earlier ideas of using a CCTV style for the serious part of the film. To do this I made it black and white and added noise both on the video and on the sound (white noise). I then dissolved to a more colourful image without white noise (as I zoomed in in the original footage.)
Towards the end, I added my own recording of party blowers as well as a clip of the start of Cliff Richard's "Congratulations" song as I thought it was appropriate and fitted in well with the build up to the change of mood.
I also think my use of titles fitted well with the moods of the film
Friday 3 December 2010
Final One Shot Film Seminar.
Today was out last seminar for DP1. Wooop? :) Anyway we learned basics of editing in Premiere Pro CS4, and started to experiment for our personal edits of our group's film.
I have decided to base mine on a idea I came up with when filming our first idea - CCTV. To achieve this I will edit the first, more serious part of the film in black and white with added "noise" effect. I will also use an appropriate font on my titles near the start to fit with this style
Later on in the film, when the mood changes to "PARTY!", I will fade from black and white and then into a more highly saturated style to fit in with this mood. I could also add appropriate styles of font with "Happy Birthday!" perhaps?
Anyhow, here is our totally unedited film. The snow does distract from the main focus, I must admit. But we tried our best under the circumstances and it is looking a lot better from my editing so far.
Final One Shot Film - Unedited from Samantha Freeman on Vimeo.
Thursday 2 December 2010
Update on all sorts of stuff. BUSY, BUSY.
So, ive been very busy over the past week or two!
- Essay. I have completed this, sent it to Jools and in the process of responding to the feedback before submission.
- One Shot Film. We have filmed our final shot, but had a lot of trouble due to the weather! Stupid snow! :(
One Shot.
I havent currently got the file for our one shot film as I haven't been able to get into uni since we filmed due to the snow. I doubt I will get in tomorrow either so will need to get one of my group to email it to me before my assessment and presentation. Anyway, we persevered with filming in the very short intervals where the snow wasn't very heavy on Tuesday (obviously protecting the camera at all times with an umbrella. What a nice job I had :L) We wanted to keep with our original idea and thought this wouldn't work in a studio, which is why we stuck to the same setting despite the weather. I haven't seen the finished product on a PC screen yet due to my absence (sorry team!) but will hopefully soon have a go at editing it with sounds and effects on Premiere to improve the appearance and quality of our film.
Will keep you posted.
Presentation.
I won't post too much on here about the presentation as it isn't really necessary, but here is a preview of the first of my HTML pages produced on photoshop, linked with notepad using hotspots. Next I need to complete the pages of my presentation, complete cue cards and rehearse my speech to last approx. 10 minutes. Tough much?


- Essay. I have completed this, sent it to Jools and in the process of responding to the feedback before submission.
- One Shot Film. We have filmed our final shot, but had a lot of trouble due to the weather! Stupid snow! :(
- Presentation for DP1. I have decided to do a HTML format of presentation and have started producing a lot of the pages.
One Shot.
I havent currently got the file for our one shot film as I haven't been able to get into uni since we filmed due to the snow. I doubt I will get in tomorrow either so will need to get one of my group to email it to me before my assessment and presentation. Anyway, we persevered with filming in the very short intervals where the snow wasn't very heavy on Tuesday (obviously protecting the camera at all times with an umbrella. What a nice job I had :L) We wanted to keep with our original idea and thought this wouldn't work in a studio, which is why we stuck to the same setting despite the weather. I haven't seen the finished product on a PC screen yet due to my absence (sorry team!) but will hopefully soon have a go at editing it with sounds and effects on Premiere to improve the appearance and quality of our film.
Will keep you posted.
Presentation.
I won't post too much on here about the presentation as it isn't really necessary, but here is a preview of the first of my HTML pages produced on photoshop, linked with notepad using hotspots. Next I need to complete the pages of my presentation, complete cue cards and rehearse my speech to last approx. 10 minutes. Tough much?


Saturday 27 November 2010
Lighting Seminar.
In yesterday's seminar we discussed and practiced the use of lighting in film. I learned that in most lighting situations there are 3 different lights - 3 point lighting. This includes a key light (hard), back light (hard), and a fill light (soft) to fill in the shadows.
I also learned the three main properties of light
-Coherence (quality)
-Colour temperature (colour)
-Intensity (strength)
Taking all we were taught in the first hour into account, we were then given a task for most of the rest of the seminar. Our group was given the task of creating daylight inside a studio, and to evidence it with a short interview style film.
We found this quite difficult at first as it seemed very dark in general, with the subject's face very bright. Once we viewed the film on a PC, iwe also found the quality to be much lower because of the use of automatic settings on the camera. Here is one of our first examples of experimenting with the lighting...
Later on we realised this was due to camera settings not our poor use of light, so we fixed this and refilmed our interview. We did this by using manual settings - resetting the white balance automatically and setting the iris setting to 0dB. Once we did this, everything was much clearer and the background was black with no obvious shadows. This is the final result of our experimentation with lighting and filters...
I also learned the three main properties of light
-Coherence (quality)
-Colour temperature (colour)
-Intensity (strength)
Taking all we were taught in the first hour into account, we were then given a task for most of the rest of the seminar. Our group was given the task of creating daylight inside a studio, and to evidence it with a short interview style film.
We found this quite difficult at first as it seemed very dark in general, with the subject's face very bright. Once we viewed the film on a PC, iwe also found the quality to be much lower because of the use of automatic settings on the camera. Here is one of our first examples of experimenting with the lighting...
Lighting Practice (First try) from Samantha Freeman on Vimeo.
Later on we realised this was due to camera settings not our poor use of light, so we fixed this and refilmed our interview. We did this by using manual settings - resetting the white balance automatically and setting the iris setting to 0dB. Once we did this, everything was much clearer and the background was black with no obvious shadows. This is the final result of our experimentation with lighting and filters...
Wednesday 24 November 2010
One Shot Idea.
In response to the feedback we got from Deborah whilst on set of our mini practice film last Friday, we decided to keep the same basic idea of an idea drop off, but give it a TWIST! (:
The main idea for this "twist" in our idea sessions was one involving comedy. So this is what we are going with. We have also come up with a few more important aspects for our final film....
Materials/Props:
Party poppers
Party hats
Small cake?
Newspaper/magazine?
Mobile phone?
Envelope
Birthday card
Roles:
Me - Camera person (whoopeeee)
Amanda & Hollie - Party-goers
Leigh - Envelope person (oh rubbish vocab)
Elliot - Birthday boy! :|
Basically, it will start serious, like the other example, where a person appears with an envelope then when the "birthday boy" arrives, the envelope will be passed over - birthday card. When this is revealed, the party goers will jump into the shot with party poppers, party hats and cake! Pretty silly really, but hopefully an effective way of audience trickery (genre). Hope it all works out well.
Here is a very simple storyboard I did. Sorry for the poor picture quality couldnt be bothered to scan it properly haha.

Monday 22 November 2010
Today....
We had to go in at 9am today for a lecture on our end of module presenation and assessment... It seemed to help confirm my worries about how to produce it, but has also stressed me out a little. :P
We have been told to produce the main bulk of our presentation using our "best work". This means the work I think best answers the brief and has been the most successful overall. I am still not sure but I think I will mainly base mine on my interactive space project (improved version since the online link I posted here!), as I think it is now much more effective and has had some good feedback so far. I am in the process of getting more feedback.
It was also suggested to make our presentations using other methods than just a powerpoint presentation, as this would be the least they expect of us. I have decided, to link in with my work, I will produce a HTML coded interactive-style presentation. I am in the process of producing the first few pages of this at the moment on photoshop and notepad. (Dreamweaver is against me. Won't work on my laptop. Boohoo!) So it could take a while. Start early hmm!
After the lecture, I also met up with 2 of my One Shot team in the library to discuss and finalise some ideas for our final film this week or next week. We decided on going with the comical twist on the "drop off" idea. Perhaps using an envelope containing a birthday card instead of a bag? I will update my blog when I have finished the storyboard I started and finalised what we are doing.
Sayonara.
Saturday 20 November 2010
CRAP improvements... That is such an ironic title.
Here is the first improvement of the rather rubbish graphic designer CV I uploaded earlier in the week. I maintained the style it was in, using a simple photograph of line paper as a background, and screen-drawn squiggly sort of shape for the titles. :) I also just aligned sections in order of relevance, and used a computerised font for easier reading.

Another design I found that I personally thought wasn't very effective overall was this Forrest Gump DVD cover...
 I didn't like how the image was from the back and seemed to have been clumsily placed in the middle, whereas the title was placed to the right, and the award reference placed on the left. Not following the CRAP rules much? Bad times. I also didn't like how most of the design was neutral colours, then the title was in bright red and blue. I think this was too much of a contrast in comparison to the low contrast feel of the rest of the design, which is more appropriate to the film.
Therefore, I edited it on Photoshop to make everything aligned to the right of the design, and used a better, clearer picture of a similar style, but showing the front of Mr Gump. I also lowered the contrast of the text and sized it appropriately. I think it looks more professional myself. :)


Another design I found that I personally thought wasn't very effective overall was this Forrest Gump DVD cover...

Therefore, I edited it on Photoshop to make everything aligned to the right of the design, and used a better, clearer picture of a similar style, but showing the front of Mr Gump. I also lowered the contrast of the text and sized it appropriately. I think it looks more professional myself. :)

Friday 19 November 2010
Practice Film(s)...
Today we had our first seminar with Deborah... We basically did a few takes of the simple practice film we planned in groups today. Plus Hollie joined our little team. Welcome! :)
We did a simple version of the complex plan I wrote about last night, aha! Good thing really. It involved two main characters dropping off and picking up a secret package. We tried this from various angles. These are my favourite of the four we produced today...
We did a simple version of the complex plan I wrote about last night, aha! Good thing really. It involved two main characters dropping off and picking up a secret package. We tried this from various angles. These are my favourite of the four we produced today...
One Shot Practice 1 from Samantha Freeman on Vimeo.
One Shot Practice 2 from Samantha Freeman on Vimeo.
Thursday 18 November 2010
First One Shot Seminar.
So today I started the third and final subject in my Design Practice 1 rotation. Moving image - One Shot Film.
I am going to be honest, this is the one out of the three subjects that I have been looking forward to the least. I'm not really into film and cinematography - I much prefer still photography. I am also not too keen on working in groups to produce work as I am often referred to as an independant learner... However, I plan to try and enjoy the subject as much as possible and get some productive work done with my group.
Today, we firstly discussed the concept of a one shot film and what limitations it will involve. For instance - we have to make our film using only one shot and are only allowed to pan, zoom or track the camera once in the whole film.
We also discussed briefly the process of risk assessment. The main mood of this discussion was BORING. But I guess it has to be done. :P I think we will have to do it tomorrow before starting filming our practice piece.
I gathered that...
Risk - The possibility or likelihood of danger or an accident occuring. (e.g. there is high risk when filming in a crowded place?)
Hazard - Something present that could cause danger or accident. (e.g. a steep and/or slippery surface could be a hazard when producing a film with action)
We walked around the aboretum for half an hour today too, picking possible settings for our first short film. We decided on one of two places - either under a tunnel/bridge area towards the back of the park, or on a bench near the large monument.
The main idea that arose in our short group talk after this 'walk' was a discussion/confrontation between two characters in a suspicious sort of style. For example, one character (let's call him Bob) is sat on a bench (organised meeting place?) with a large bag or object to sneakily leave for another character he will meet (Fred) to pick up. However, when he gets to the meeting place, a poor, homeless person (Tramp!) is already sat there.. 'Bob' would leave the bag under the bench and walk off, but the 'Tramp' would steal the bag and run. 'Fred' would turn up and then run after 'Bob', starting a confrontation in the background.
This is my interpretation of the basic idea we discussed anyway. We will probably alter this or simplify it in one or two ways to make sure it doesn't get too long or complicated, as it is only a practice one shot film!
The objects associated with risks/hazards I thought up whilst brainstorming this idea were...
-Wet floor/leaves
-Uneven floor
-People in the same area
-Filming equipment
Although this is a very different genre/mood of film and uses a lot of tracking, panning and zooming, it is still a one shot film using similar subjects and composition that we discussed in seminar. (i.e. over shoulder shots of people sat on a bench) so thought it was appropriate to share on here.
Tuesday 16 November 2010
CRAP, another seminar task ;)
Today I had to bring in a few examples of what I consider to be bad layout design (i.e. that does not follow the C.R.A.P way of designing ;) )
So what is this 'crap'ness I hear you ask?
Contrast - This can be achieved with variations in colour or boldness, etc.
Repetition - By using the same font or technique over and over and over and over...
Alignment - Using invisible lines of alignment to link sections together. Like in this list.
Proximity - Making things that link together closer.. andviceversa,perhaps.
These are factors that should always be considered in layout/composition of design. This is something I will remember for all of my future work. Whether written or visual. :D
Now to the task. We looked at our examples of poor layout design and discussed what was wrong or could be improved. Now we need to pick one of these and re-make it, improving the layout and overall design as much as we feel we can or need to.

I chose this design. It is is a CV for a graphic designer. Or as they like to call it "grahic designer". Epic fail. The first thing on my list is to correct this spelling mistake if I am going to improve it at all! Although, to be honest, I will be starting it again on Photoshop. I will take a photo of lined paper, manipulate it, add text and other details similar to the title in the original, and put the sections in order of relevance. I could even remove one or two sections due to irrelevance. (e.g awards?)
I will post my finished pieces next week.
So what is this 'crap'ness I hear you ask?
Contrast - This can be achieved with variations in colour or boldness, etc.
Repetition - By using the same font or technique over and over and over and over...
Alignment - Using invisible lines of alignment to link sections together. Like in this list.
Proximity - Making things that link together closer.. andviceversa,perhaps.
These are factors that should always be considered in layout/composition of design. This is something I will remember for all of my future work. Whether written or visual. :D
Now to the task. We looked at our examples of poor layout design and discussed what was wrong or could be improved. Now we need to pick one of these and re-make it, improving the layout and overall design as much as we feel we can or need to.
I chose this design. It is is a CV for a graphic designer. Or as they like to call it "grahic designer". Epic fail. The first thing on my list is to correct this spelling mistake if I am going to improve it at all! Although, to be honest, I will be starting it again on Photoshop. I will take a photo of lined paper, manipulate it, add text and other details similar to the title in the original, and put the sections in order of relevance. I could even remove one or two sections due to irrelevance. (e.g awards?)
I also need to find another example of bad design and improve this in a similar way. I will probably use one of the DVD/CD covers I looked at before today's lecture...
Monday 15 November 2010
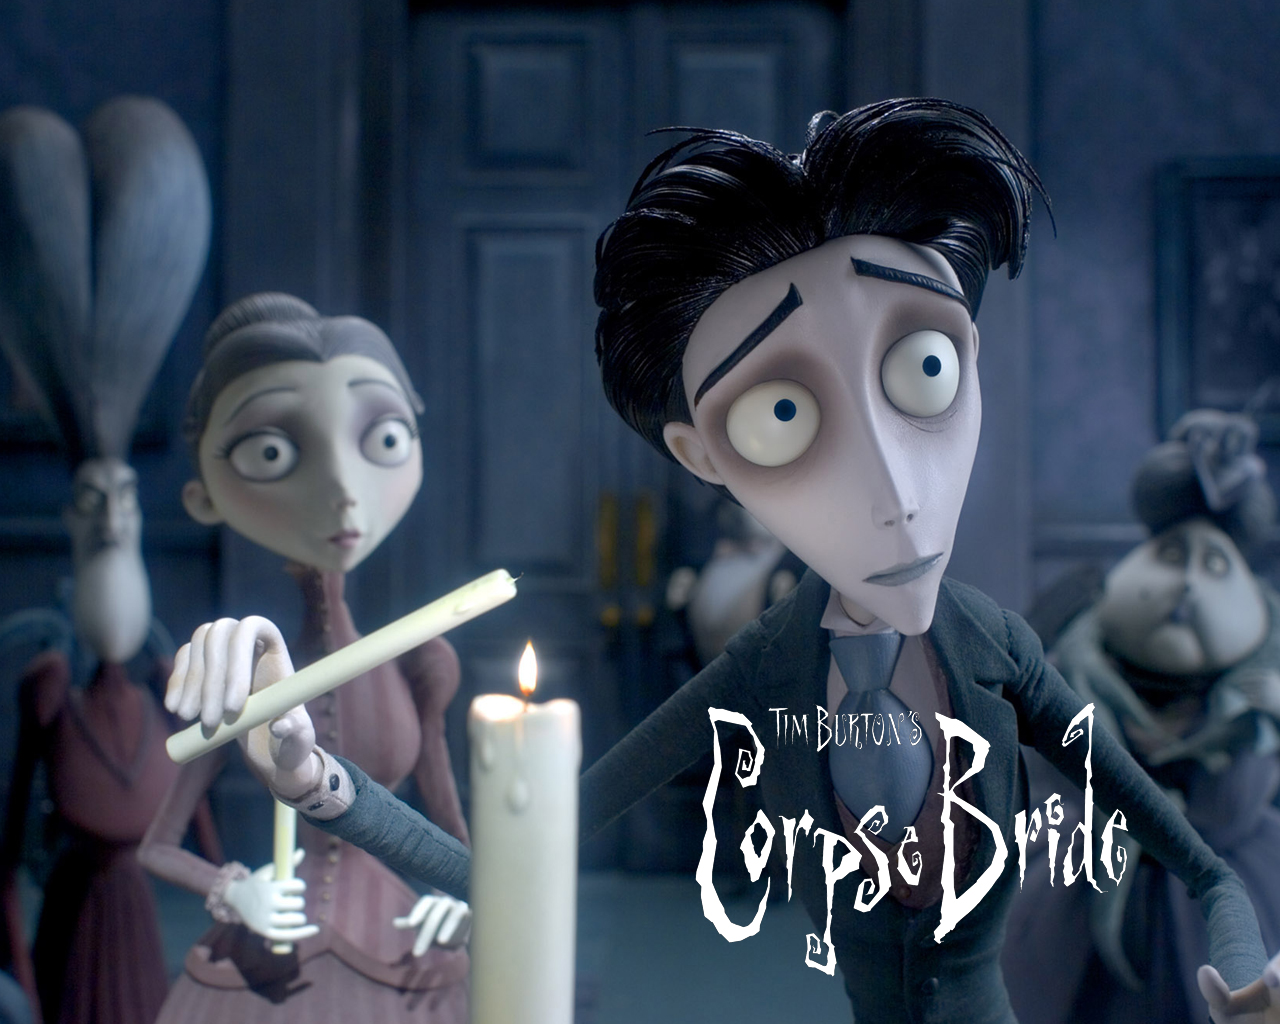
9 - Animated Film by Shane Acker & Tim Burton
Watched this film at the weekend. I heard Tim Burton produced it so persuaded my boyfriend to let me borrow his copy of the DVD. I reaaally liked the styling of it in general... The plot was very strange and honestly creeped me out a bit (I am a wuss for weird films, lol.) but totally loved the characters and environment. (Although I was convinced 9 was a strange rip off of Sackboy from LittleBigPlanet! :P)
Here is the trailer. Awesome stuff.
Here is the trailer. Awesome stuff.
Animation Rationale & Final Edit of my TV Ident.
SJF Ident - Sound from Samantha Freeman on Vimeo.
Over the past three weeks I have been focusing on the practice of animation in my Design Practice 1 module. My task was to produce a 30 second animation on 3DS Max to be used as an ident on my own TV station.
I decided to just use my initials as the station name in my ident. This very simply but effectively represents me and gives me a chance to use some typography in my work; therefore adding written clues to what the station could contain. I also decided to include a quite basic character based on the skills I learned in my second seminar. This character was loosely based upon me and my interests – the glasses being the main feature of my influence! The rest of the alterations on the character were mainly just to give it a cartoony, cute style, as this is quite simply the style of character I would most want on my own TV station!
I experimented with animation on 3DS Max for a while before deciding on the motion to be used in my final ident. I played with tools such as bend, extrude, stretch, melt, etc. to try to mimic jelly-like movements when jumping and sliding across the screen. These are movements I decided on using due to my experimentation working out quite well.
I also experimented with materials, cameras and lighting for a short while to help me figure out how to make my character and its surroundings look as good as I could with the little knowledge of modelling I had. I think this worked out quite well, although I would have liked to have learned more about textures and lighting to enhance the quality of my renderings.
I have found this project very interesting, mainly due to specialising in animation in my previous course. I have always found animation fascinating; particularly stop motion pieces (Coraline, etc.) However, now I have discovered how 3D animation can be produced, I have grown a great interest in improving my skills and discovering more about the subject.
Thursday 11 November 2010
Uploaded videos to vimeo. Edits 1 + 2. Voila.
I have done my first edit without sound... I am currently on the that task (:
Here is my first go at it...
SJF Ident - No sound from Samantha Freeman on Vimeo.
I found the movement of the glasses slightly awkward near the start, so I will try and improve this in 3DS max and render these frames again before adding sound to my finished piece.
Here is what I now consider as my final ident design. It may change as I can be picky with things like this and alter them constantly :) but I think this will be my main edit. I have tried to alter the fault with the glasses slightly and have added a few sound effects to make it more interesting.
SJF Ident - Sound from Samantha Freeman on Vimeo.
Tuesday 9 November 2010
Finally figured out how to post it!
Here is my first animation sample from week one - JELLYYY.
First Jelly Animation from Samantha Freeman on Vimeo.
First Jelly Animation from Samantha Freeman on Vimeo.
Monday 8 November 2010
Latest rendered samples...
Here's how some of how my animation's going so far.
Only done about 275 frames and it looks quite slow as it is. How to fill the rest without it all being text falling or my character zooming about? HMMM..
Voila!

Only done about 275 frames and it looks quite slow as it is. How to fill the rest without it all being text falling or my character zooming about? HMMM..
Voila!

Friday 5 November 2010
Doodlez and stuff.
Did a bit of sketching to plan my final idea today... To make up for my missed seminar yesterday... Stupid cold keeps coming back to haunt me! :(

This idea very much uses the tutorials we have followed in seminars (text and jellyhead!), as these are features I think I can now use fairly well on the software. However, I have added certain aspects I have explored and discovered myself - glasses, teeth editing, arms, character movement/bending/stretching, etc.
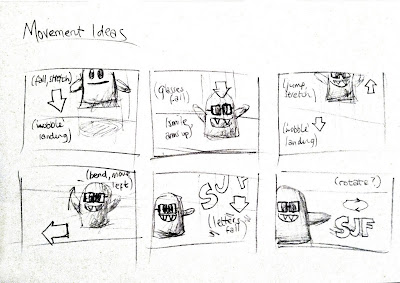
This idea has a strong use of moving text (falling or spinning, perhaps?) so I have looked at a few current idents using similar styles to help me decide how to approach this. Here are a couple of my favourites...
Anyway, heres my main character idea and quick storyboarded sketches of what movement I could try and include in my ident.


This idea has a strong use of moving text (falling or spinning, perhaps?) so I have looked at a few current idents using similar styles to help me decide how to approach this. Here are a couple of my favourites...
Thursday 4 November 2010
Made this idea..
Did a lot of messing about on 3ds max today...
This is the main thing that came out of it...


Very much based on the character we did in the seminar I think you will notice, but plan to edit it even more to make it suitable for the brief. I just really liked the cuteness of it :P and simplicity.
I also finally managed to make a shape that looked slightly like glasses today to fit in with my main idea for the ident. So might actually persue with this one now.
Will keep you posted. (:
Monday 1 November 2010
Changed my mind...
I had a go at the seminar notes for tomorrow.
Done this so far.. surprisingly easy when you get used to it.


I won't save it though, I shall redo it tomorrow to get used to the process more and help my friends if they struggle. I'm quite liking this stuff now. Still doubting whether I will be able to produce something totally different from this style, but can I can always try! :)
Done this so far.. surprisingly easy when you get used to it.

Tomorrow...
Just looked at the notes for my 2nd animation seminar tomorrow. Actually making a character? A cool jelly character? Yay!
I hope this isn't too difficult to follow, I could try and do it now as I have the software... but I might leave it till tomorrow when I have guidance and friends to share my annoyance with >:D haha!
Perhaps I could use a character like this with glasses on for my animation? Ideas are coming along nicely... until I realise I really can't do the modelling. Aha D:
I shall see tomorrow! :)
Sunday 31 October 2010
More playing around with ideas...
I have messed around on 3DS max even more today... Didn't do any sketches but managed to get straight stuck into it with my idea using glasses.
So far I have produced a simple glasses shape, although I couldn't figure out how to remove the lens area, so just used a cube shape of the background colour. I also added some eyes to animate through the glasses. This follows my previous simple, cartoony style.
Screenshot time...


So far I have produced a simple glasses shape, although I couldn't figure out how to remove the lens area, so just used a cube shape of the background colour. I also added some eyes to animate through the glasses. This follows my previous simple, cartoony style.
Screenshot time...


Saturday 30 October 2010
3ds max - hmm...
If I am brutally honest, now I have installed the program onto my laptop and attempted to follow tutorial videos and produce an object other than a basic shape or text... I am not liking it too much. Very confusing. I am a bit baffled on how to come up with an idea and make it on this program in 3 weeks... It will probably take me that long to figure out how to make one of the shapes I want?
Hmm indeed...
Anyway, this is very rubbish and took me hours (surprisingly) but I tried to produce a very poor, cartoon style face on 3ds max. I also animated it floating forwards and to the sides.. As with my other example though, I have no idea how to get my rendered images into an actual animation or video file. I will look into this this week I think.
Screenshots of this: (the rendered images were a bit pale... no idea why to be honest!)


I would like to figure out how to make glasses on there actually. To avoid facial features, I think a good way of representing myself could be to do with my glasses or hair. These are what people seem to notice about me first... Oh joy. :P I will sketch some ideas for this theme tomorrow.
Goodnight.
Wednesday 27 October 2010
Animation Project.
So, I was given the brief for my new project in DP1 today - 3D animation.
My main task is to produce a television ident for a channel/station based on myself and my social networking sites. (e.g. Facebook, Twitter...)
Here are examples of existing televsion idents using 3D animation that I quite like...
In my first seminar yesterday, I learned the basics of 3Ds max (the software I must use in this pathway) to make a simple animation of the word "JELLY" jumping and bouncing on the floor (in a jelly-like fashion - clever much?
I couldn't figure out how to put my rendered stills together an animation on Premiere Pro yesterday, and do not have this software at home (maybe I shall find a way at some point haha), so here are a few of the 100 rendered stills from the animated sequence...


My Interactive Space (online!)
Here is the URL for the start of my interactive space on Making New Maps. (http://www.makingnewmaps.com/ is the homepage for my peers' work)
http://www.makingnewmaps.com/maps/Samantha_Freeman/index.html
Hope you like it! I may change this further to make it more interactive before my final presentation in week 20 :)
Thankss.
http://www.makingnewmaps.com/maps/Samantha_Freeman/index.html
Hope you like it! I may change this further to make it more interactive before my final presentation in week 20 :)
Thankss.
Saturday 23 October 2010
Interactive Space Rationale
My main idea in this project was for my images to act like a first person activity where they can walk around a house. I also wanted to bring a sense of mystery through using cut outs (doorways) to hide what was coming next, as well as giving the images a dark mood and including quite interesting uses of typography. I am quite interested in this darker style of design and film, particularly animation by Tim Burton. For instance, his dark, gothic style of typography in his work inspires me, as well as a dominant use of black and dull colour tone throughout some of his imagery.
In my first idea/attempt at linking pages, I gave the user total choice of which part of the house to go to. For instance, they would go through the front door, then get a choice of 3 pathways and then 2-4 choices beyond these. I also included links back to the original hallway to carry on the exploration.
I showed this version in my seminar group presentation with Simon, and it was brought up that this was quite confusing and frustrating as a strategy of getting around the pages. It was also mentioned in other presentations that it would be a good idea to give the user a reward for progressing correctly (e.g give my sequence an actual end, rather than just linking in random orders).
I did this by only giving each image a maximum of 2 choice hotspots, so my sequence wasn't too complex or confusing for the user. Although this meant, after the first few pages, my interactive space is quite linear in structure (not many choices for the user to make), I think this was more successful than my previous attempt, as it is more obvious what is needed to progress to the end. I also made sure the end page didn't give a link back to the hallway, but only to "play again" in the corner. I think this was a good way of rewarding the user - by suggesting they have completed the "game", as it were.
Thursday 21 October 2010
Last Seminar...
So today I have my last seminar for this part of the Design Practice 1 module (Interactive Space). I have just about finished my interactive sequence using HTML and am almost ready to submit my folders to be uploaded onto the Making New Maps site. I think its been quite successful, and have recently added typography to my images as well as desaturating them slightly, which I think has added more effect. I also think the use of hidden hot spots (links) in my images is more effective than my previous versions with borders on the "hover" style instruction.
Here is a preview of the first 3 images before the choices kick in!


Here is a preview of the first 3 images before the choices kick in!


Tuesday 19 October 2010
Interactive Narrative in "Heavy Rain - Move Edition"
I recently posted here for my Context 1 module about the new Playstation Move feature on the Playstation 3. Yesterday after uni, I purchased the "move edition" of the well known game "Heavy Rain".
This game is based on interactive narratives and choice making, which I have grown an interest in since starting my current Interactive Space project in Design Practice 1. Having seen my boyfriend play the regular version of the game on Sunday, I really liked the idea of its interactivity and thought the move edition would add to this player involvement.
Although I have only just started this game, I am finding it really interesting and a great inspiration for this current topic. It's also much less typical in style and artwork than other popular games I have come across (First person shooters, motor racing, mafia, etc.) I think this could be also be influential when I go onto my next project - 3D animation.
Saturday 16 October 2010
My Multimedia.
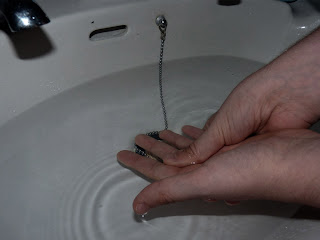
This week, for my Context 1 module, I have been given the task to write about a recent piece of multimedia that interests me. So, seeing as I use my Playstation 3 practically everyday, I have chosen to focus on the new "Playstation Move" feature.
I have owned my Nintendo Wii for approximately 2 years (since whenever it was first released) and was really excited at the time about the interactivity of the Wii remote. However, after finishing my college course I decided to purchase a Playstation 3 for the higher quality of game graphics (Blu-ray powered HD) and to play online games such as Modern Warfare 2 (Call of Duty), LittleBigPlanet, and Modnation Racers. Although these games aren't as interactive as some on the Wii, I thought they were much more realistic and visually pleasing.
When I heard about the Playstation Move I couldn't wait to get it, as it brought together my favourite aspects of both consoles. Unlike the Wii's sensor bar strategy, the Playstation Move controller is tracked using a USB camera. The end of the "remote", as it were, lights up a certain colour, and this is picked up on the camera, as well as the user themselves. This is much more accurate than the previous option chose by Nintendo, and gives much more realistic gameplay. (See video above!)
I am really pleased with the product so far and can't wait for them to bring out new compatible games. I think this shows where gaming is heading, and soon we could all be moving around our living rooms to control a variety of games. Could this be the end of the original, gamer-style controllers, though? I should think not!
Thursday 14 October 2010
Interactive Space Latest - HTML!
So, this week I have learned the basics of HTML coding and CSS styling stuff. To be honest, I remember not liking it at school (so long ago though!) so wasn't expecting to like this subject area, but actually quite enjoyed it. :o
I am liking how this project is not boring typical web design like I was expecting this specialism to involve. The interactive aspect and the use of photography/Photoshop has made me quite enjoy what I have produced so far, despite really wanting to do animation.
Anyway... HTML.. What do I know?
<html>
<head>
<body>
<br> <b> <i> <u>
<a href="...">
<img src="...">
That's all I can think of, but the site http://www.w3schools.com/ is a great help when making my pages. I have also learned how all these tags must be nested within each other to work, as well as about hexidecimal colour codes (#FF0000).
I found HTML a lot easier on Dreamweaver as it was more visual and the colour coded parts did make it easier to figure out!
Looking forward to completing the interactive site next week!
Sayonara.
Monday 11 October 2010
Photographs. (:
These are the photographs I took yesterday for my Interactive Space project. I think they follow my previously drawn out plans very well actually! :o I have posted them in the same order as the narrative tree thing I posted before this.. so, yeah, quite complicated to visualise, but you can try to follow that! (Basically the doors and main objects in each picture would be clicked on - e.g. click on the stairs area to go upstairs or click on the fridge in the kitchen to retrieve the lucozade!!)


I have played around with "levels" and "hue/saturation" tools mainly on Photoshop to enhance these pictures. I have also reduced/cropped them to a 1024x768 size, as this is the size (I think!) they need to be on the final webpage.
Enjoy.
Subscribe to:
Posts (Atom)